Ghostbusters MAME Arcade Cabinet Complete
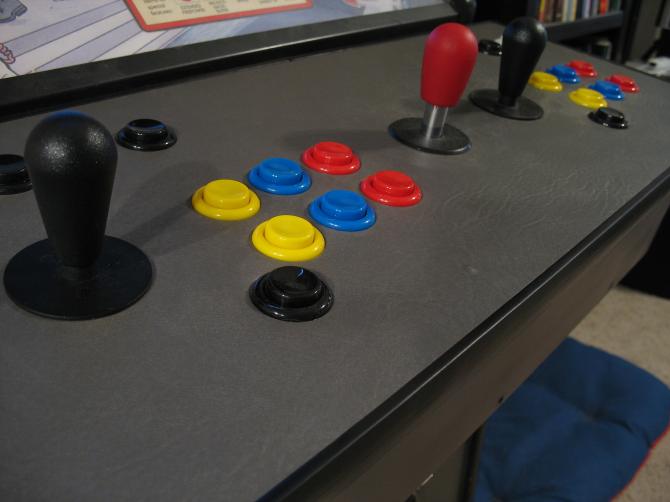
Tuesday, May 5th, 2009The t-molding came in on Friday and I had some time on Saturday, so I installed the t-molding and finished up the project. I took some pictures of the control panel on the finished arcade.
I don’t have a router, but a coworker’s father was in town with all of his tools and he finally give me the means to finish the project. When I tried to install the t-molding at first there were some areas that weren’t deep enough. I used my dremel to make the slot deeper all the way around. I wouldn’t have been able to do that with the dremel alone, but since there was already a slot it helped. I have a depth guide that I attached to the dremel to make it work. I didn’t even need any glue! I just put the t-molding around the outside. Using a towel as a cushion I tapped the molding in place. The hardest part was cutting the v-shaped notches in the “t†part of the molding so it would go around the corners. Since this t-molding also had a lip I had to cut that, too. The lip was necessary to keep the vinyl down around the edges. For some reason the adhesive didn’t work very well around the edges and it wanted to come up.
I attached the top piece with the controls to the bottom piece with two hinges on the front side and a catch on the other so I can flip it up from the back to work on the wiring underneath. You can see the control panel wiring in the Unfinished section of the gallery page.
The Arcade cabinet came with a control panel, but it only allowed 2 buttons per player and the joysticks weren’t very good. The new configuration is also somewhat narrower so the machine can now fit through most doorways without taking off the control panel and the box it is on. Now that it’s done I’ve got exactly what I had envisioned!
Now, to work on that Donkey Kong high score…


